Day 1: A Special Announcement
*There are 3 activities for this day’s lesson. Feel free to choose one or two of the activities OR spread them out over several days! :)
- Materials:
- Bible (I like the NirV)
- Activity #1: Paper plate, Cutter/Scissors, Tin foil, Glue (I used craft glue), Circle cut out of white paper (about the size of a soda can), Colored permanent markers, Star stickers, Piece of yarn (2-3 feet), Stapler, Flashlight
- Activity #2: Painter’s tape, Fake feathers (white, if possible)
- Activity #3: Large rectangle cardboard, scissors, painter’s tape, Fingerpaint, Paper angel face and wings
Day 1: Lesson and Activities
- Open Bible to Luke 1. Ask if child wants to touch God’s Word. Touch gently. Then, read the story.
- God sent the angel Gabriel to a town called Nazareth. Gabriel came to Mary who was engaged to Joseph. The angel greeted her and said, “The Lord has blessed you in a special way. He is with you.”
- Mary was afraid, but the angel said to her, “Do not be afraid, Mary. God is very pleased with you. You will become pregnant and give birth to a son. You must call him Jesus. He will be great and will be called the Son of the Most High God. The Lord God will make him a king like his father David of long ago. The Son of the Most High God will rule forever over his people. and His kingdom will never end.”
- “I serve the Lord,” Mary said. “May it happen to me just as you have said.”
Activity #1:
Prep beforehand:
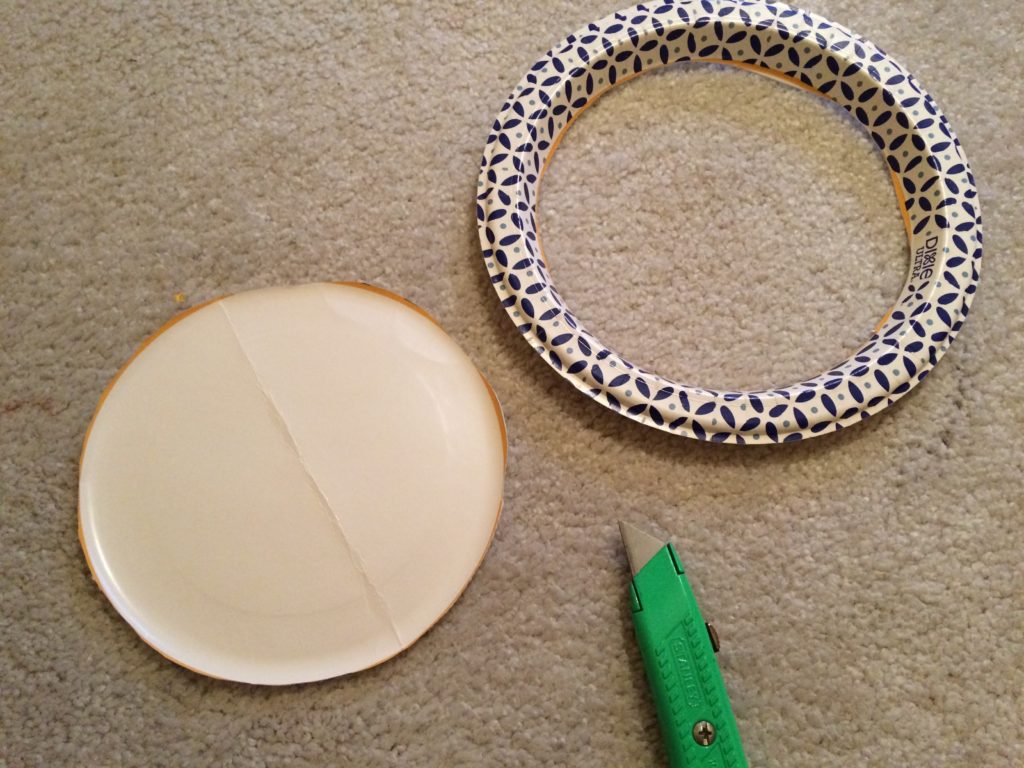
- Cut outer ridge away from paper plate (I used a cutting knife).
- Fold paper plate circle in half and make a crease. Cut along the crease so that you have 2 half circles.
- Cut a rounded triangular shape in the top of one of the halves (these will be the angel’s wings).
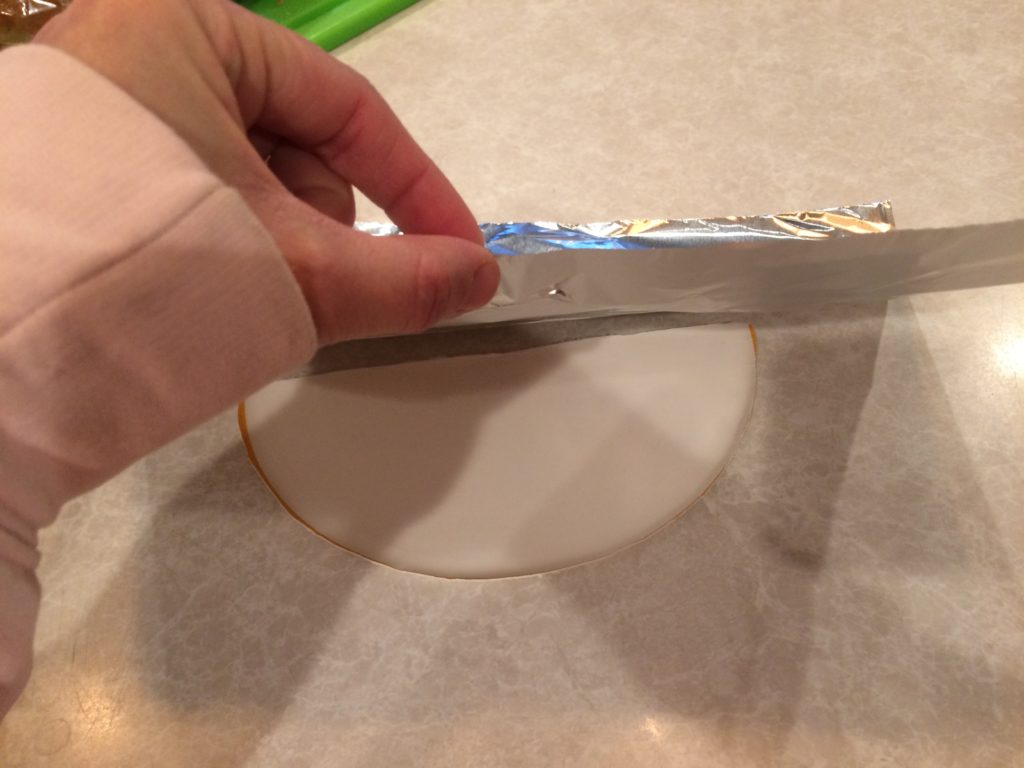
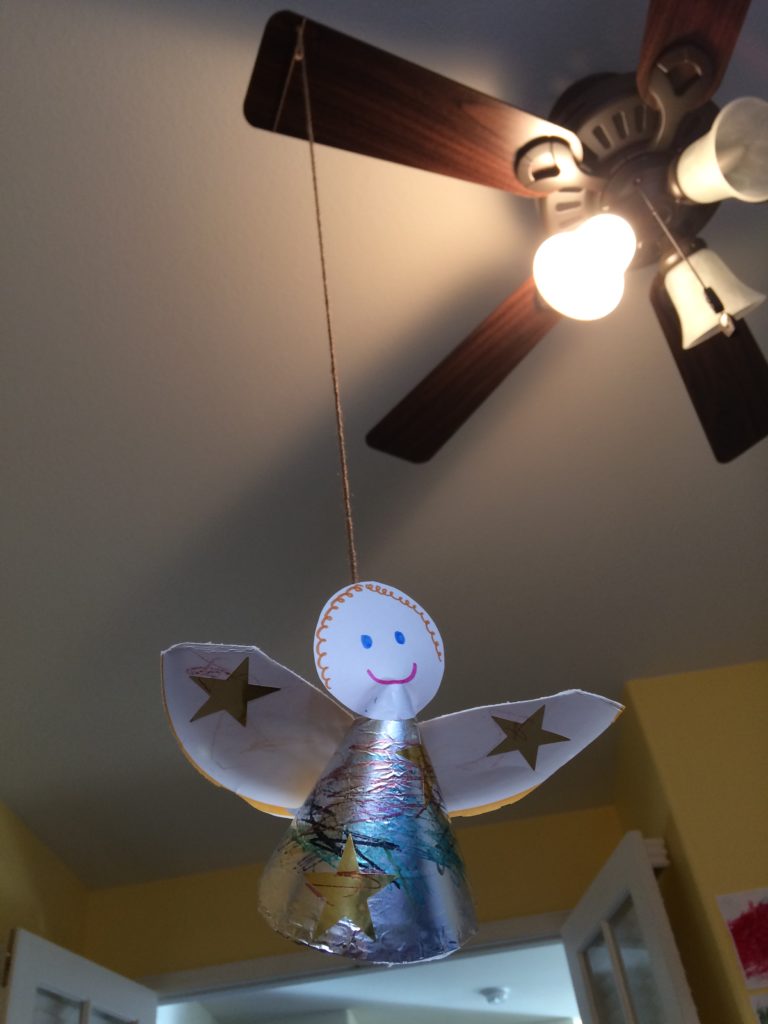
- Lay a piece of tin foil across the second half and press down to see an imprint of the shape. Cut out the tin foil piece and glue it onto the paper plate half (this will be the angel’s body).
- Use a soda can (or other object about that size) to measure and cut a circle out of white paper for the angel’s head.
Step 1 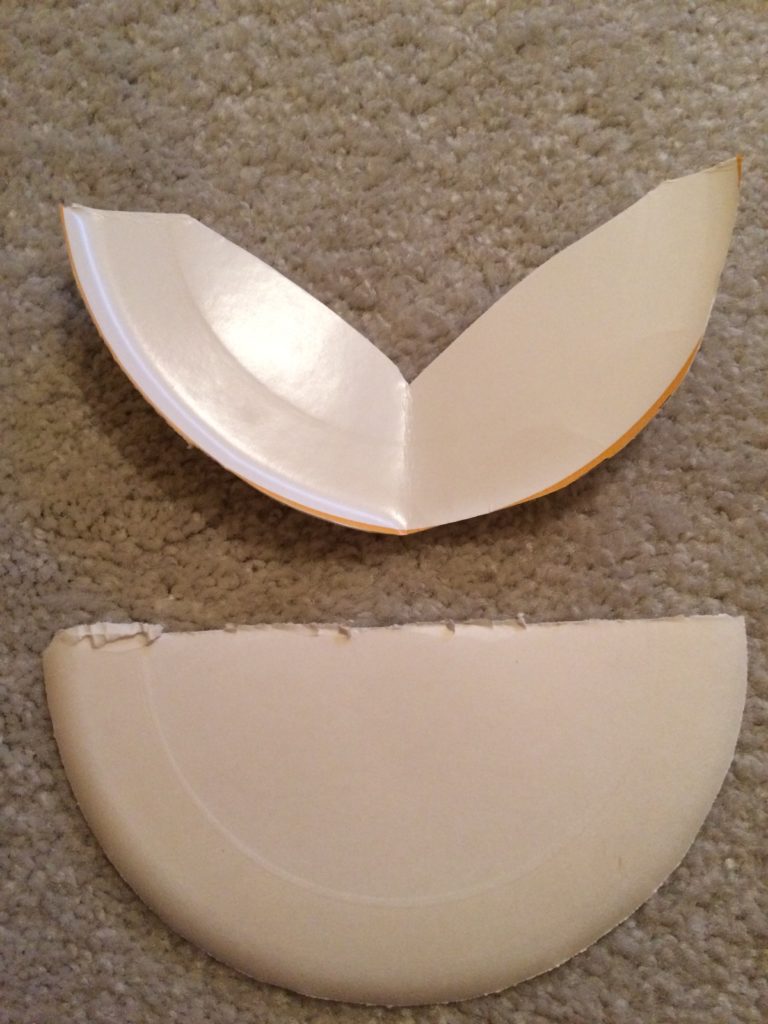
Steps 2 & 3 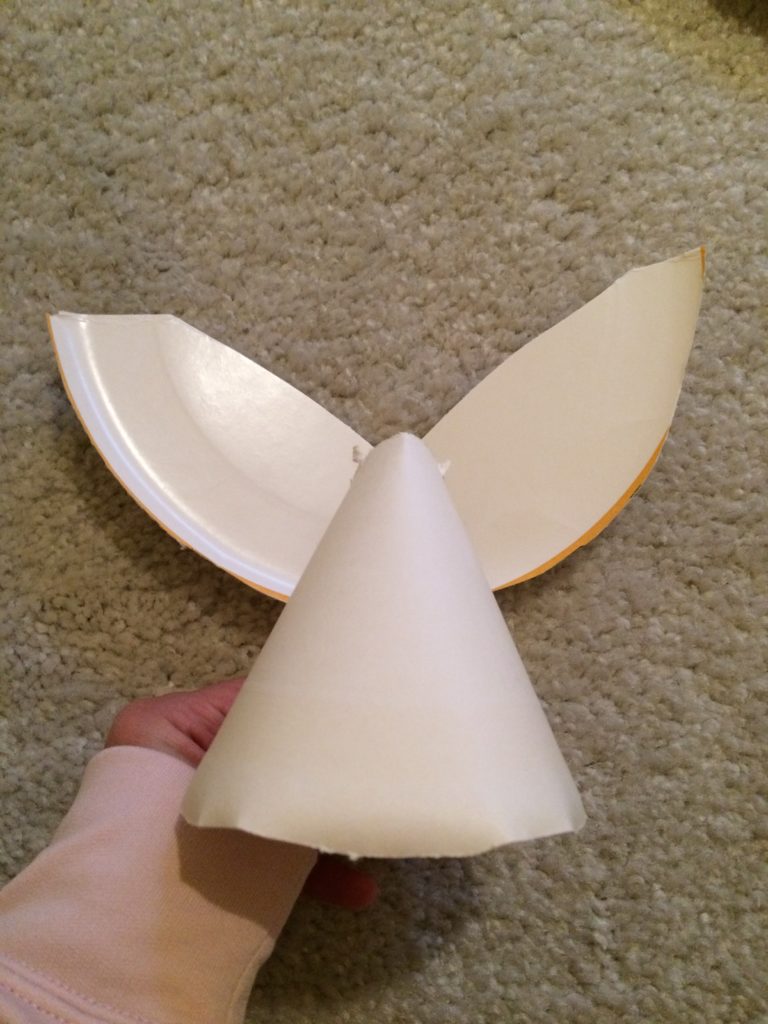
Step 4 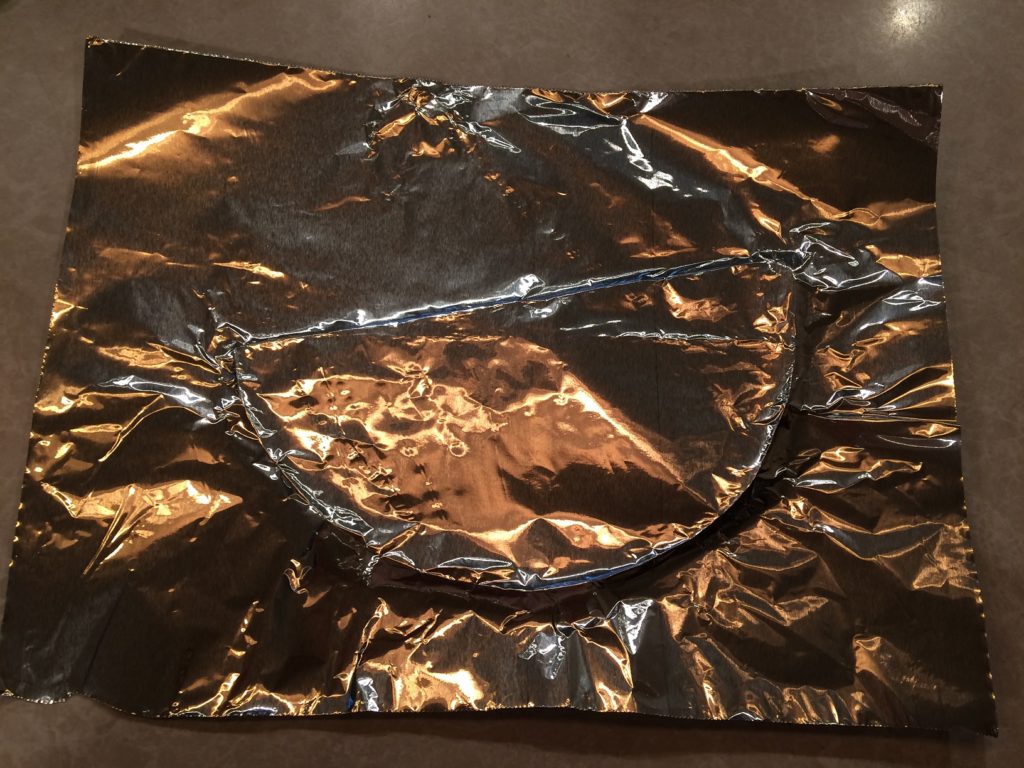
Step 4 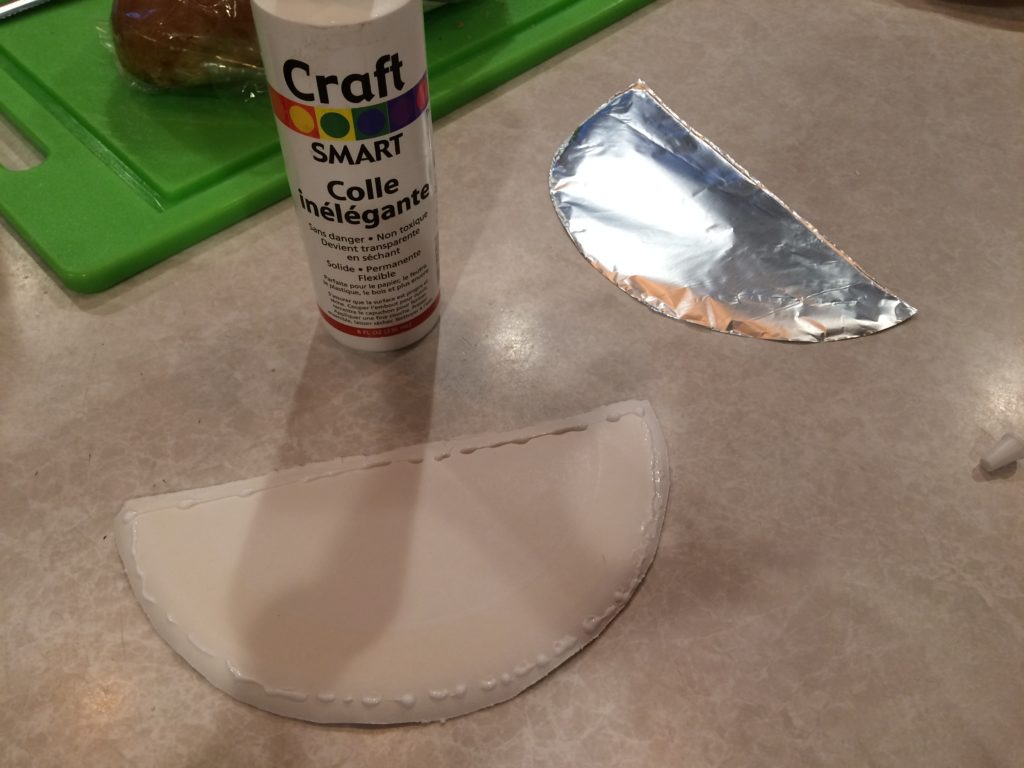
Step 4 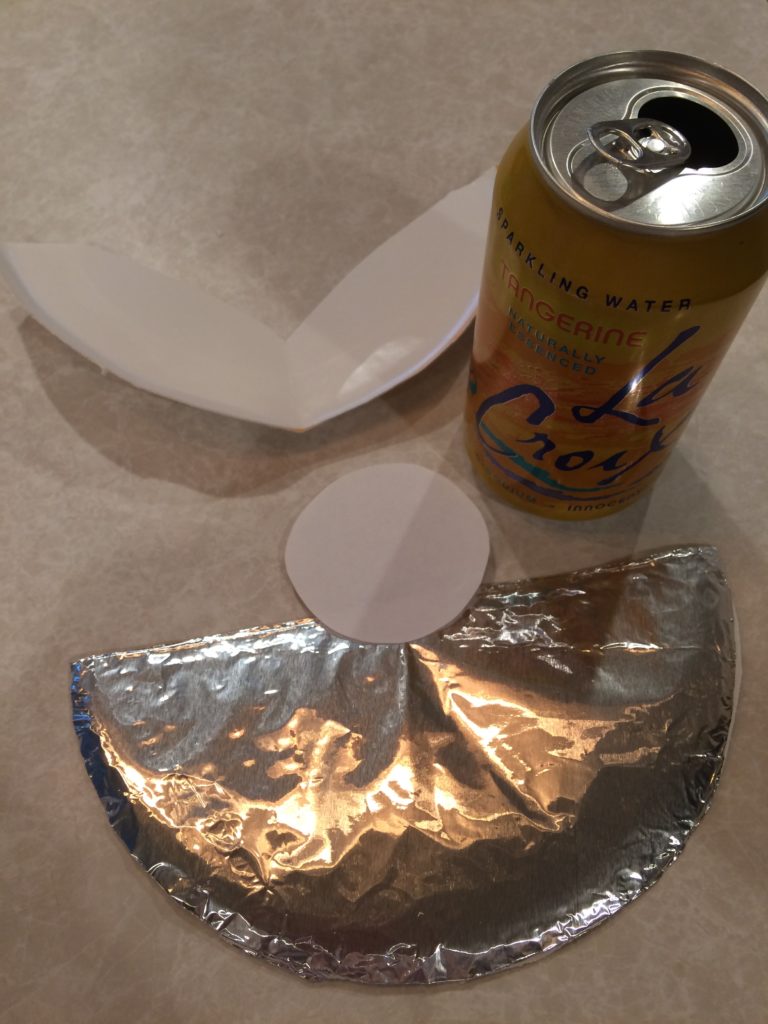
Step 5
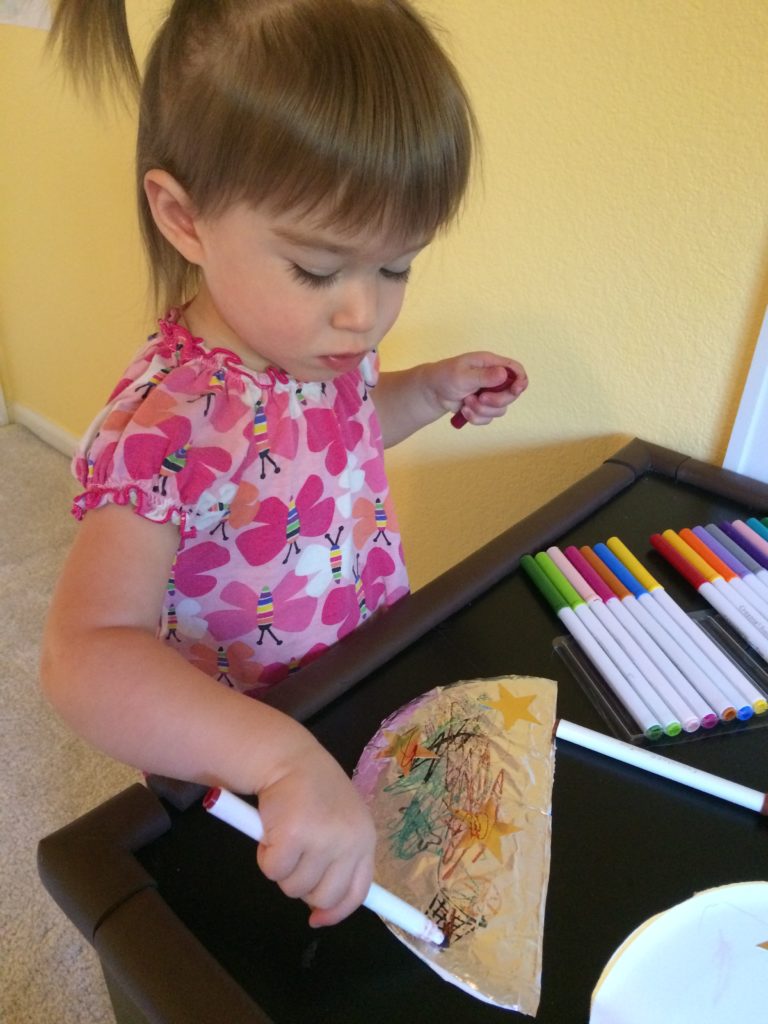
- Have your child use permanent markers to decorate the tin foil angel body and/or the wings. Draw a face on the angel head. We used washable markers, which rubbed off easily, so I dabbed it with a tissue afterwards to keep it from being too messy.
- Add some star stickers where desired.
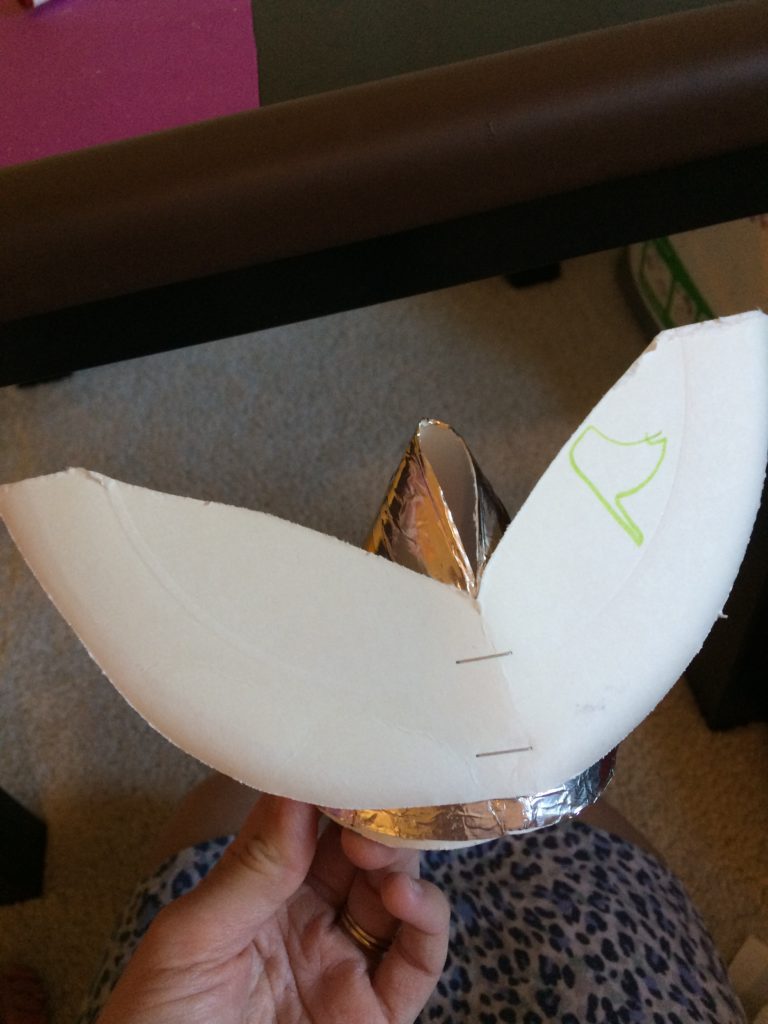
- Once done decorating, curl the angel body to form a cone and staple about 3 times along the back. Staple on the wings, and glue on the head.
- Then, feed the piece of yarn through the hole behind the angel’s head, pull it all the way out the bottom, fold it up about ½ an inch, and staple it to secure it in place.
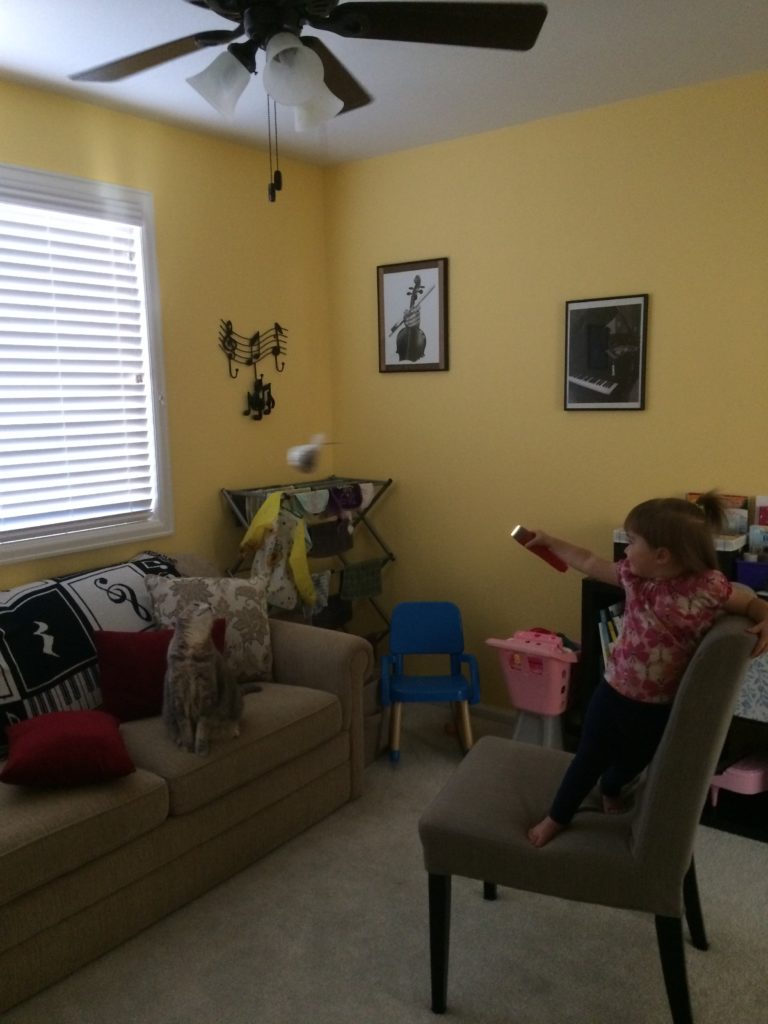
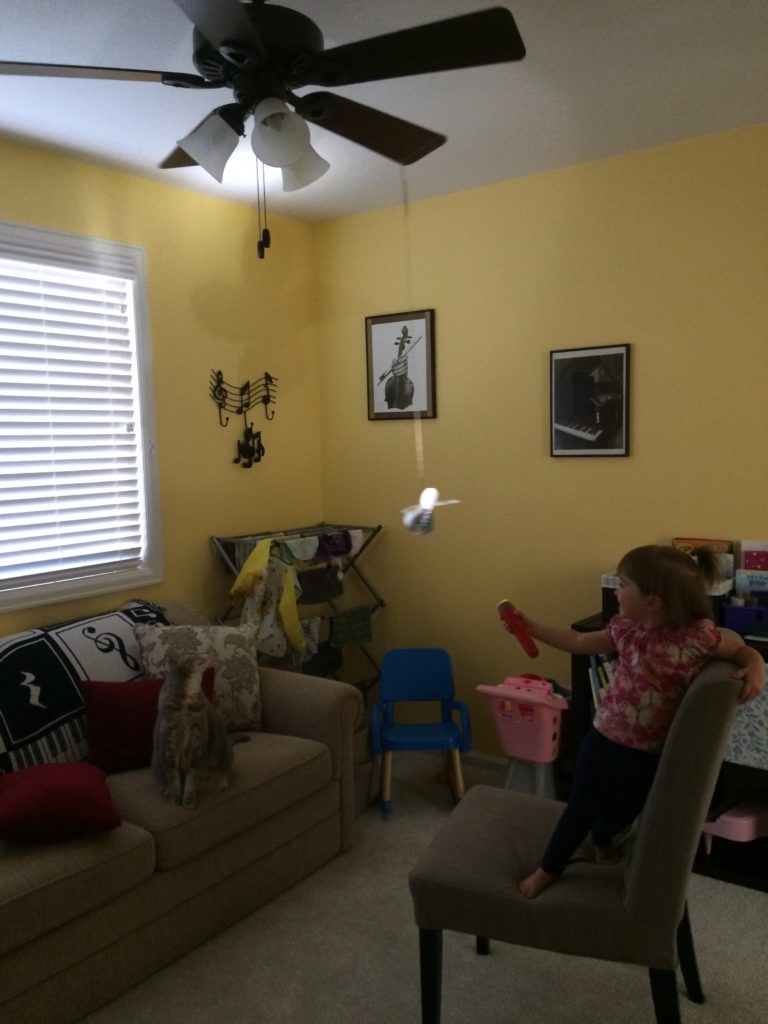
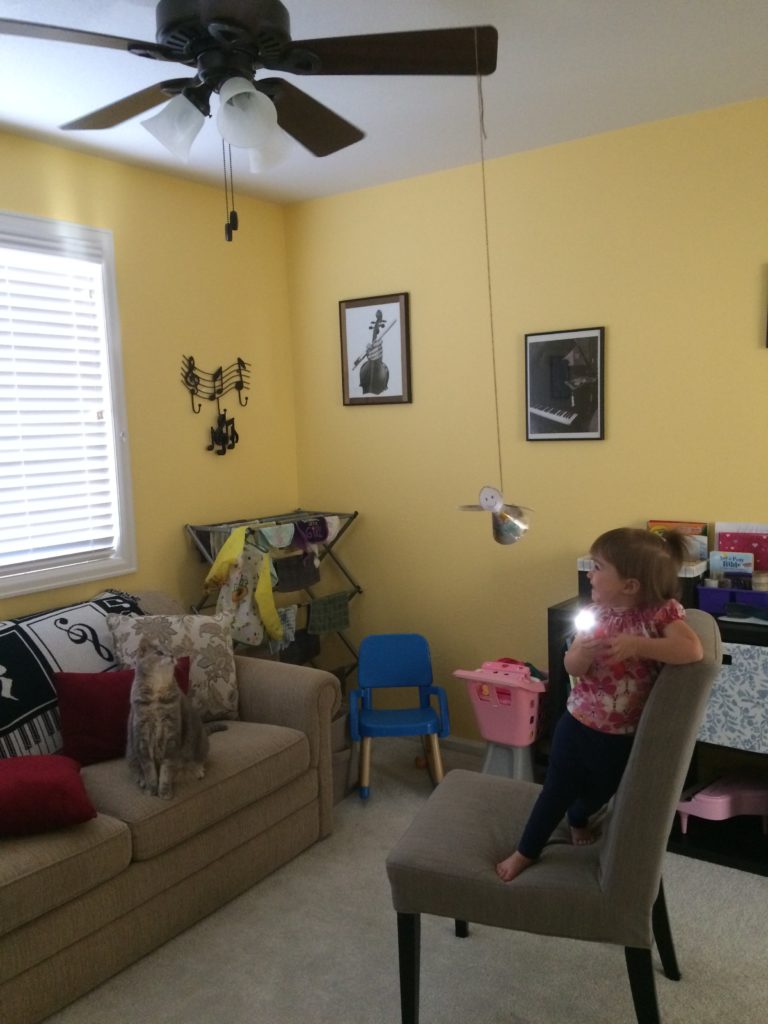
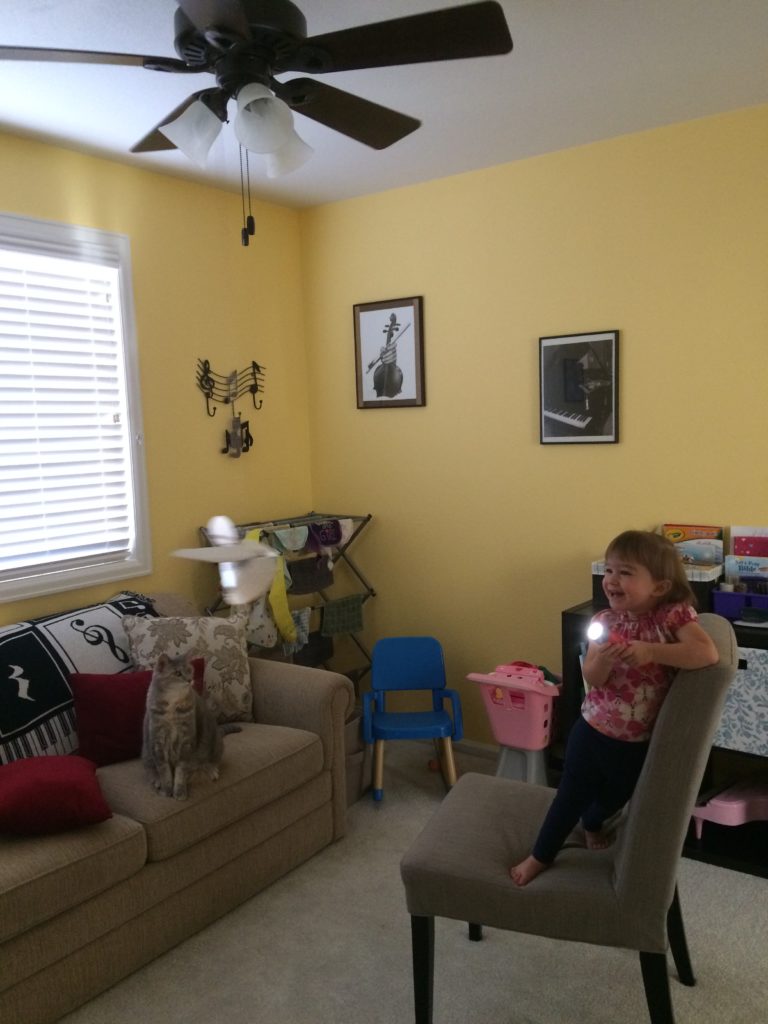
- You can dangle the angel by holding it, or attach it to a fan blade for some fun flying action!

- Sing while shining the flashlight on the flying angel. (If you’d like, you can also tell the story during this activity.) (Tune: Do You Know the Muffin Man?) Do not be afraid, my dear – for God is very pleased with you! You will have a baby boy; His name is Jesus Christ!
- Hand the flashlight to your child and challenge them to keep the light on the angel while he flies around! Katelyn loved this activity! I turned the fan on and off during the activity so that the angel would spin fast and slow.
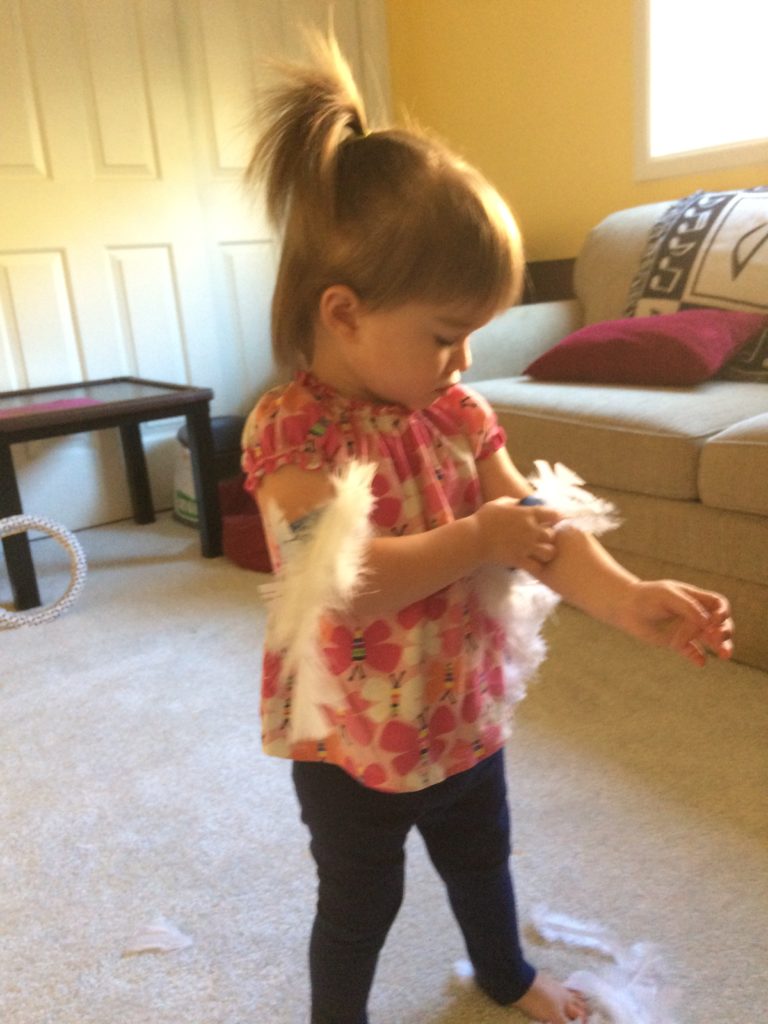
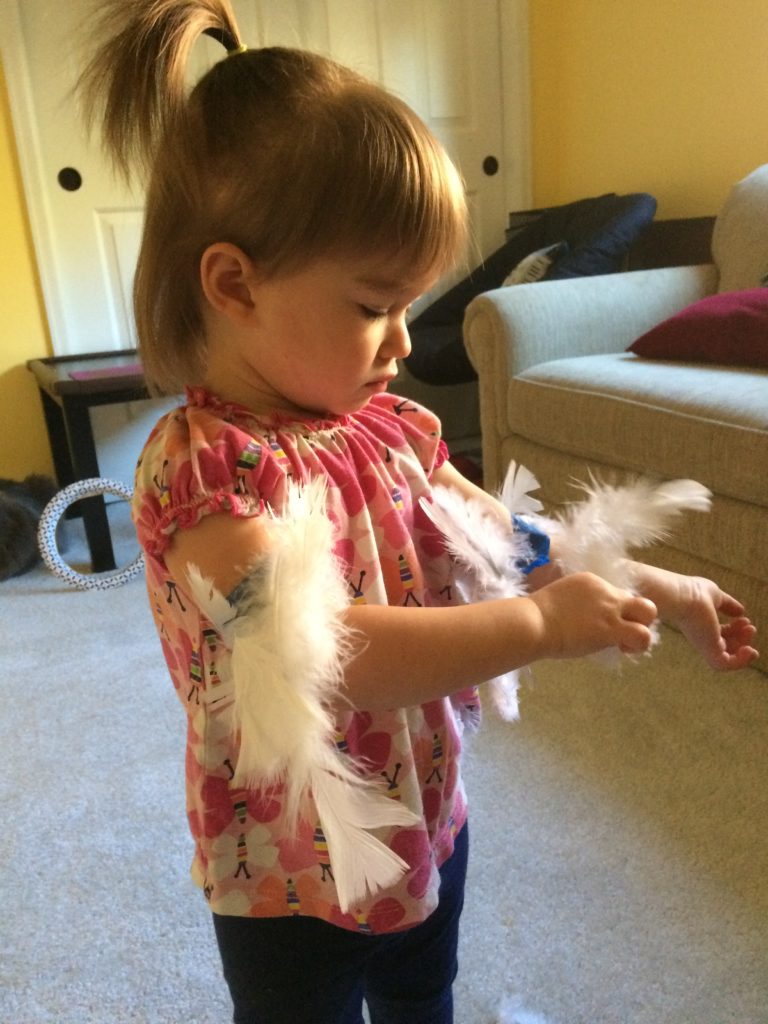
Activity #2:
- Wrap tape backwards around arms in 2 places – stick on feathers and fly around like an angel while singing!
- Sing above song while flying around.
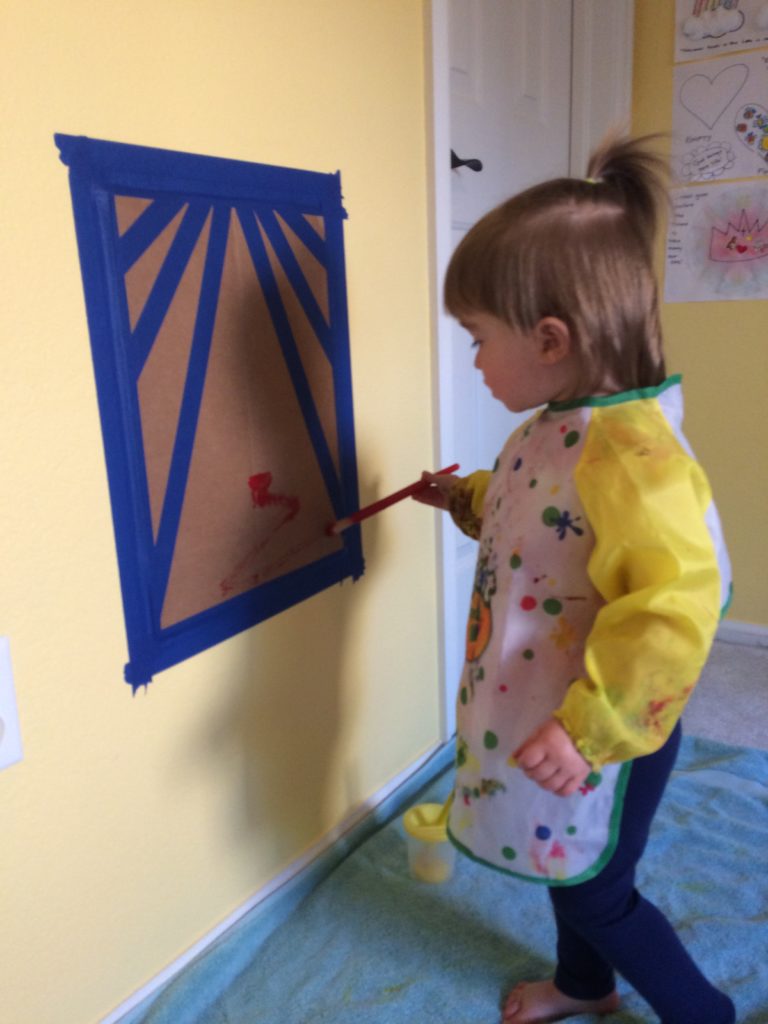
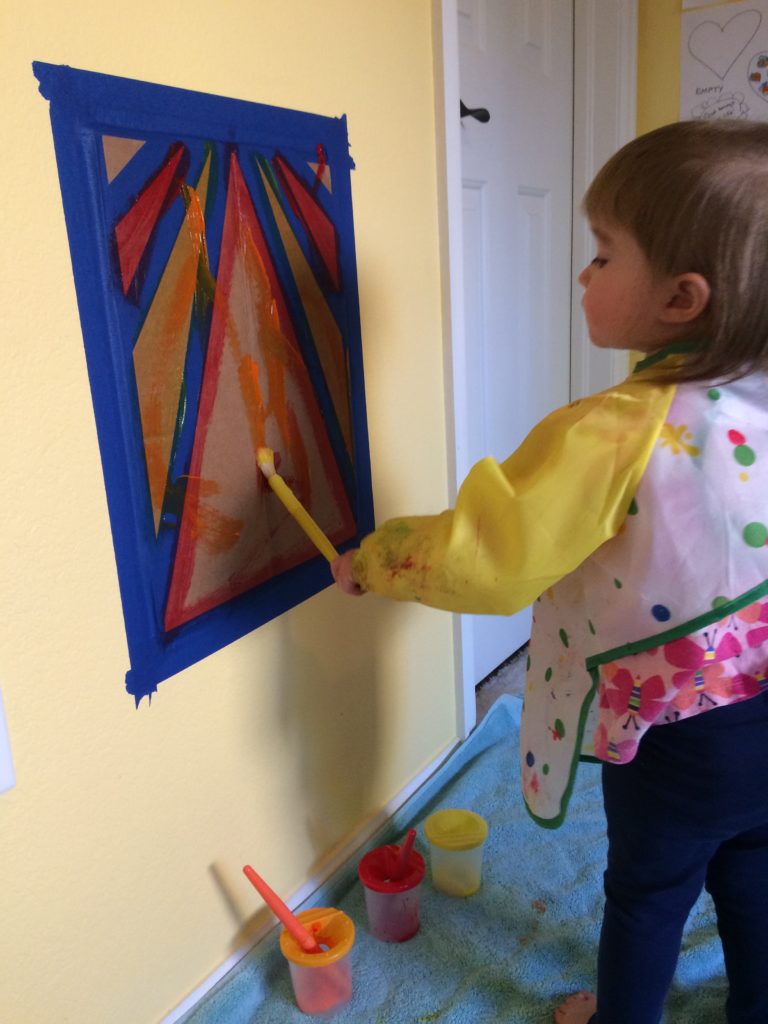
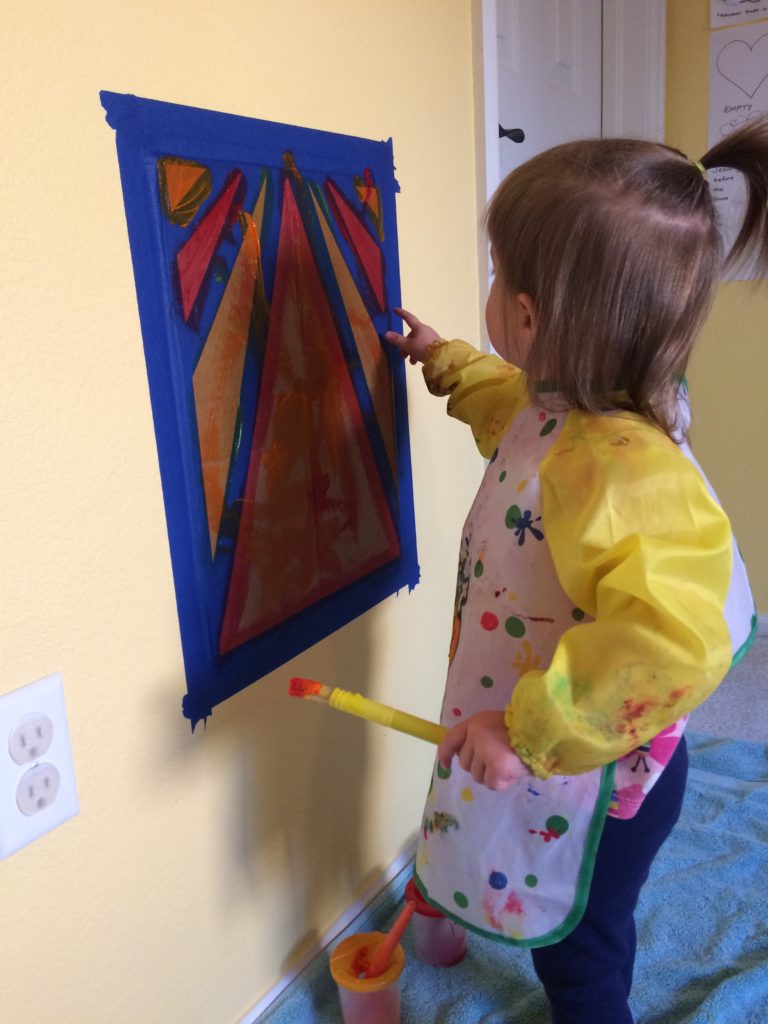
Activity #3:
- Prep: Make a triangle on a large piece of cardboard with painter’s tape. Add extra lines outside the triangle for light streaming down on the angel.
- Paint on the cardboard! I taped the cardboard up to the wall with 2 rows of tape around the edges and laid a towel down on the floor. It was a good activity to help Katelyn practice self control and focused painting on the correct surface. She is 20 months old and did great with it! You could always move this painting outside or in a shower if you’re nervous about your toddler painting all over.
- When dry, peel off the painter’s tape and add a face at the top and wings to make a decorated angel.